Thursday, July 26, 2012

Plague belt

Hello once again readers,
 Sorry things have been so quiet here on the blog been a busy last few weeks and month. I just started college for the first time (wish me luck) also have been working on a lot of projects getting ready for Dragon*Con 2012.

 Also got some awesome new on Wednesday (7-18-12) I have been invited to speak on a costuming panel at Dragon*Con! This is my second appearance at a Con as a costuming panelist,  and my first (hope not my last one) one at Dragon*Con so wish me luck. The panel I have been asked to set on is Creating on a Shoestring Budget and is Friday august 31st at 1 pm. So enough about me tooting my own horn on to the costuming:

Ok so the project we are gonna cover is the very cheap plague belt I made for my costume. This is pretty much the total bits I used for the costume:

2 empty water bottles-- $2.00
7 containers of neon green slime-- $7.00
1 foot plastic tube-- free from work
 1 Thick cardboard shipping tube -- Free
4 popsicle sticks-- Free (just ate the popsicles)
1 web gear belt-- Free ( my collection of military gear)
1 box carpet tacks-- .89
assorted paints
modge podge
Gauze
total cost= $9.89 
The first thing I did was cut the cardboard tube down to the size of the water bottles. I cut it just the size to hide the water bottles.


I actually had to use my Dremal to cut this cardboard tube due to how thick it was. Lots and lots of cardboard fluff flying around. Once we got them cut down we had to decided on the design that we wanted so that you could see the holder and also see the bottles inside. so here is the design we went with:
After everything was cut I started to reinforce the cardboard with what I had laying around the house.......DUCT-TAPE!!! I decided to support the neck of the design with a few popsicle sticks to make it a little stronger. After I glued in the sticks I added a layer of tap of them to lock them into place:


The water bottles had nothing special done to them except that I drilled a small hole in the top to insert the plastic tubing in. I filled each of the bottles with 4 bottles of slime each:


After I made sure the water bottles fit in the holders I spray-painted them with black paint. After the paint dried I noticed that the paint was not sticking to the tape so I decided to use a little gauze and glue to mimic the skin look I have used on my mask hoses:


After looking at how they looked I realized they looked a little plain so I took some carpet tacks I had laying around the house and used them to look like rivets. I had to use a small pair of wire cutters to trim off most of the pin back to make them fit without poking into the water bottles:
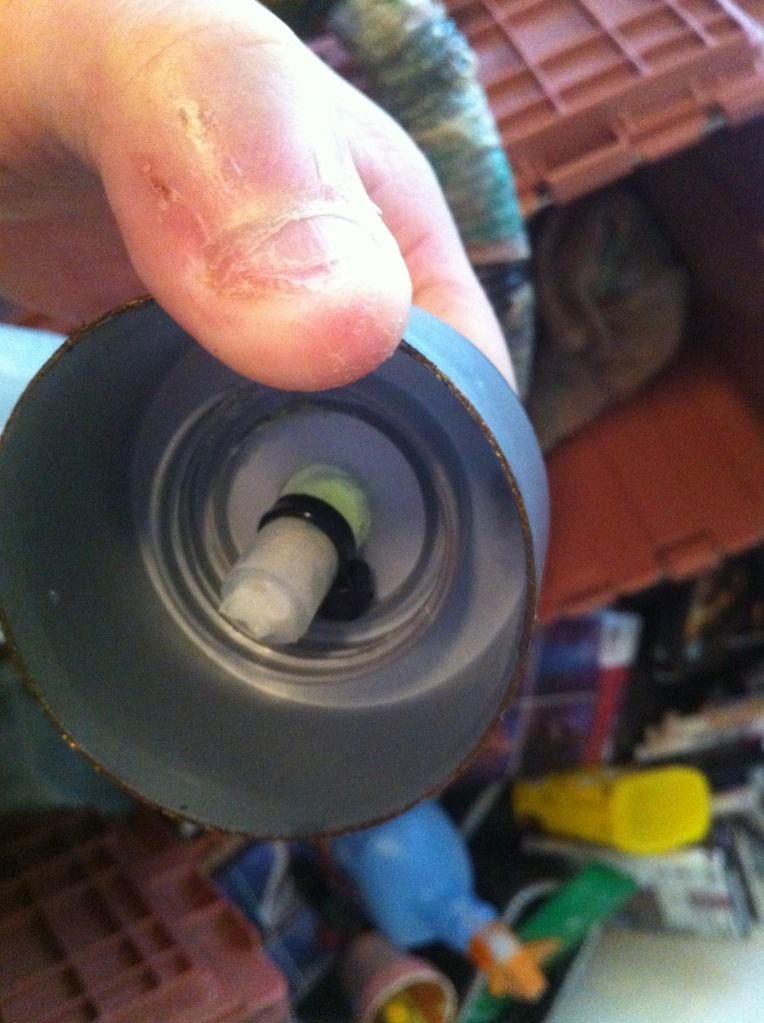
I know a few people are wondering how I got the green goo into the tubes and also got it to stay. Well the way I did that was that actually had to suck the goo into the tube (yes it taste horrible). Once I got the amount i wanted in the tubes I took small pieces of tape and rolled them and stuffed them in the end and then put a layer of Epoxy resin over the top. This was about the time I realized that I could not clue the hoses in the bottle or the skull because it would gut down on a lot of my movement. So what I did to fix this problem was I still drilled the holes to insert the hoses and once the holes we glued shut I took a small zip-tie and pulled it as tight as I could around the end of the tube. When you cut off the extra it leaves the small locking piece and it keeps the hoses from pulling all the way out:
Please pardon how rough my thumb looks; many years of biting my fingernails and hard work!
Ok sooo here we are with the complete mask layout with the belt attached to the skull. I will tell you now that the belt will be changed in the future. The web belt just does not fit into the total costume:
Just to give you an idea of how everything looks on me here is a quick picture:
The goggles and the mask are 2 separate pieces so that its not one whole mask. The only issues I have seen so far with the mask is that it kills all my side vision and limits my movement just a bit. Well ladies and gents I'm gonna close this up and get back to work. I am going to try and get a few more post out before Dragon*Con. If you see me walking around the Convention in the costume come by and say hello... I have goodies to give out:


Tuesday, June 12, 2012

Dirty lil Icons (plague banner part 2)

Hey guys!


Sorry for the long time between post but with Dragon*Con 2012 fast approaching its been busy, busy between costuming, Con, and work! This last weekend was a great weekend I was invited to present a panel on cheap costuming at a small local Con called Sci-Fi Summer Con. I had myself, my wife and another friend all talking to a small gathering (10+ people) about ways to do very cheap costuming and still look good. The below pic is from the sixpence Costuming blog panel on Budget Costuming

Sci-fi Summer Con Atlanta 2012, Atlanta GA (John Stump, Dana Stump, Linda Voronden, and Kim McGibony)


OK so on to our topic today. I told you back in part one of the plague banner that this part would cover all the extras that I made for the banner. So away we go, I'm gonna break this into sections on each part:

PLAGUE CENSERS :
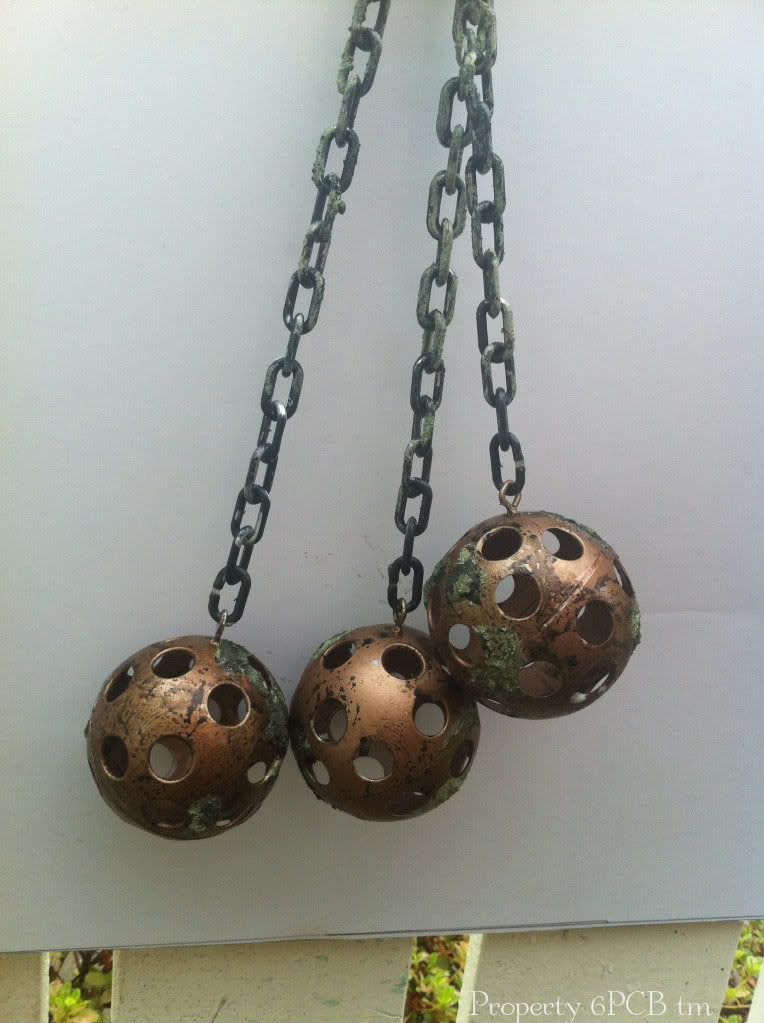
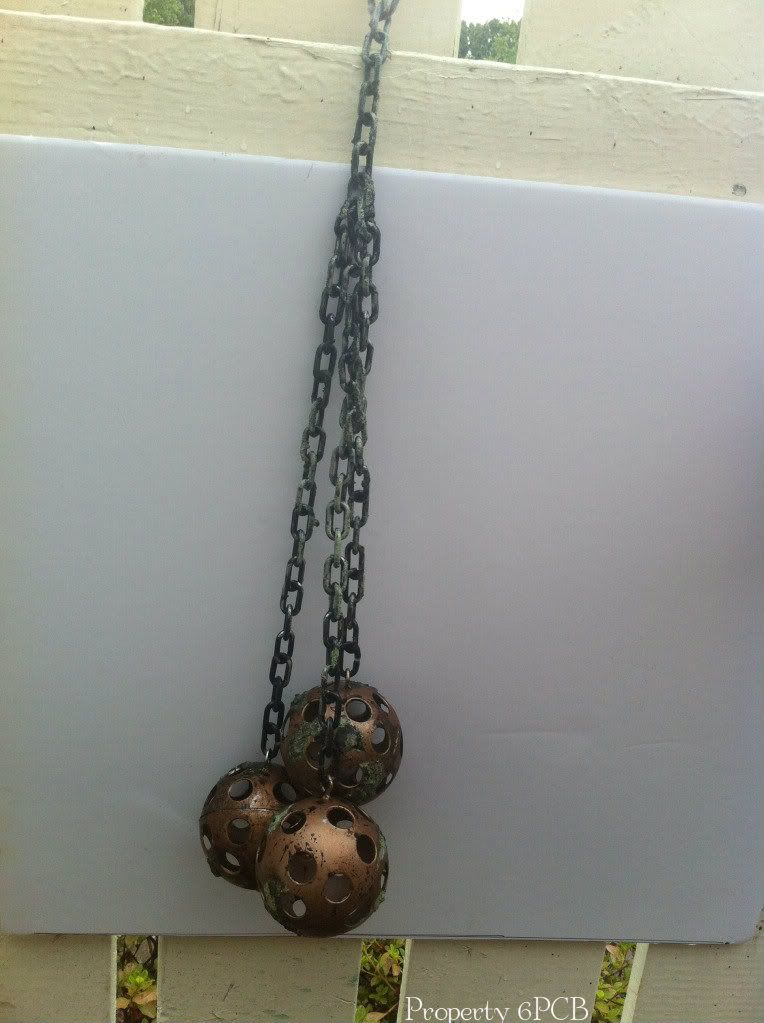
Finished censers
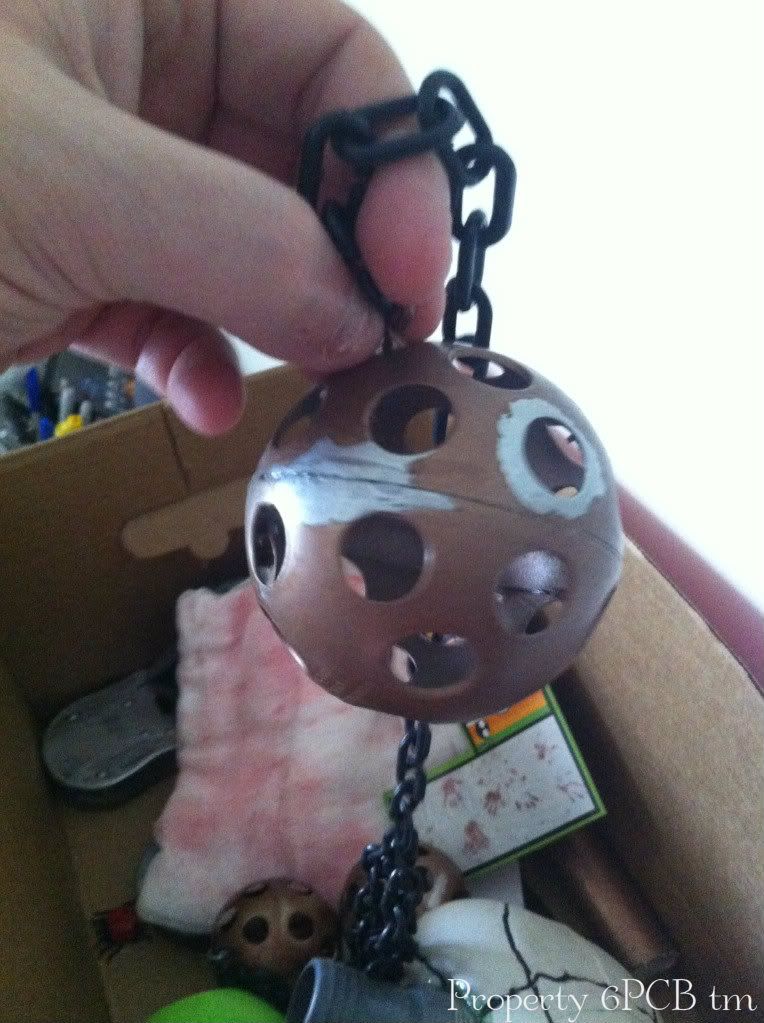
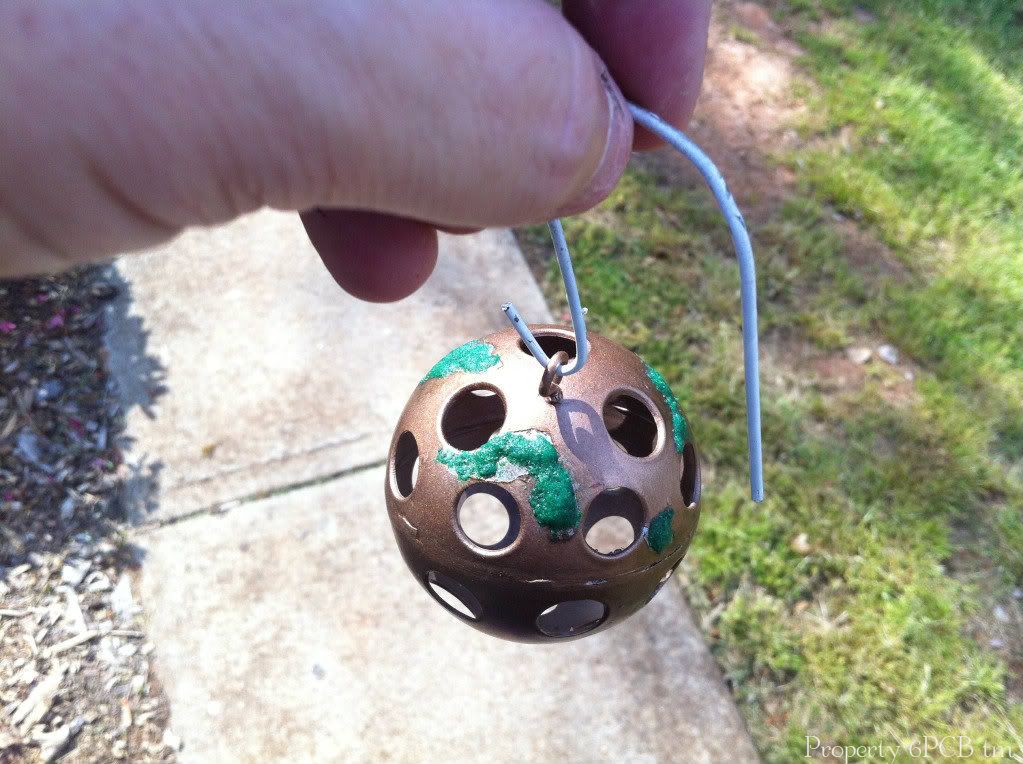
These were actually some of the cheapest props to make. You could use these as censers or as a flail. If you haven't figured out what they are yet......WIFFLE BALLS! You can get a bag of 4 of them at the dollar store. A word of advice here before you glue them together make sure you paint the inside of them or your gonna have a heck of a time painting it. I used a small amount of Epoxy resin to glue them together. After they were glued together i spray painted them with a hammered silver spray paint ( Krylon Fusion for plastics). After the paint dried I used a method of stressing called the Vaseline method, then I spayed with with a hammered copper color. This method is done by taking a small amount of Vaseline and tabbing it on the places you want to the see the undercoat then spraying on your next coat. When the top coat drys you take a rag and wipe off the Vaseline and it takes the top color with it showing you the base color.
After wiping off Vaseline


 On these what I did was once I wiped away the copper paint to expose the silver. Once everything dried I used the "Dirt method"


 I posted a few back to add some grunge to it. After everything was nice and dry I took it outside and splashed it with a black paint wash to make it look nasty and also to make the "dirt" stand out. When all this was done I took a large amount of the dirt mixture and rubbed it in my hands and rubbed it all over the chains to make them look nasty also. the plan later is to add a glow stick and cotton to the inside to make them glow.


SQUIGGLES THE CAGED PLAGUE DEMON:
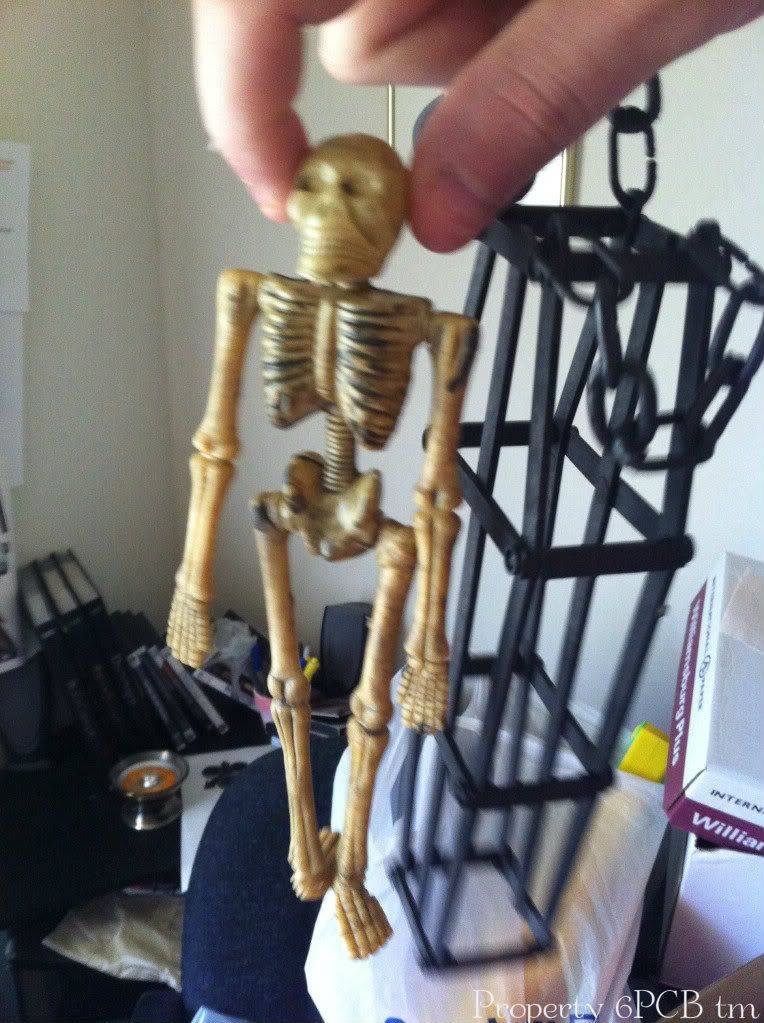
This is another of those awesome after Halloween finds and also a Dollar store find! I know I have said it many many many times in this blog but I'm gonna say it again...... DOLLAR STORE IS YOUR FRIEND. They tend to have some of the most awesome Halloween decorations for cheap. When I bought Squiggles he was just a bony skeleton in the cage:
SQUIGGLES naked


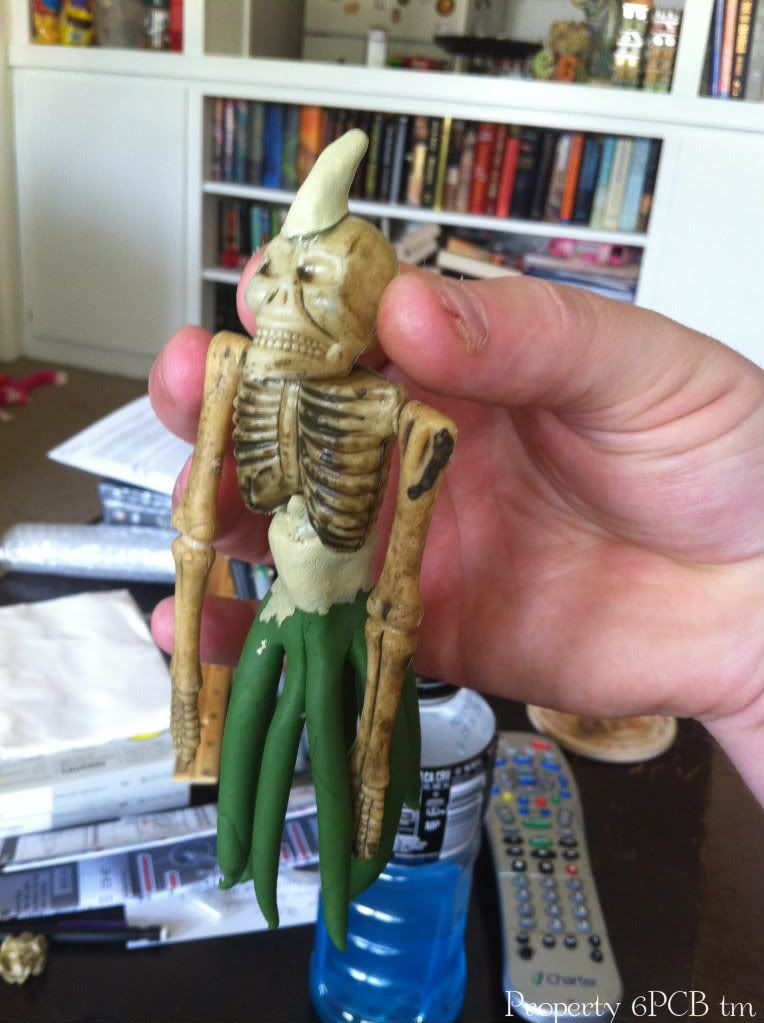
As you can see very plain and simple. The first thing I did was free him from his cage by cutting the edges of some of the bars with an X-acto and pulling him out. then I removed his hips and legs (don't worry he didn't scream that much) after the hips and legs were removed it was a simple task of breaking out some Sculpty clay and making some tentacles for him and a horn ( yes my sculpting skill need LOTS of work):
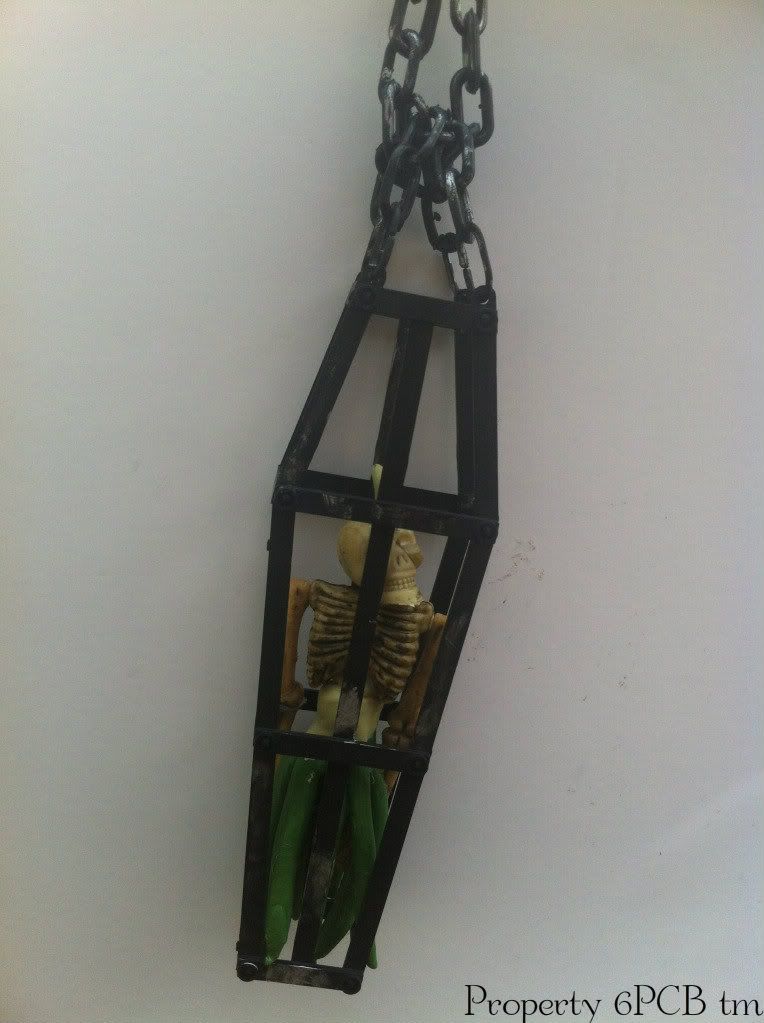
 After the clay was dry I put Squiggles back into his cage and clued it shut with a few small dabs of Epoxy resin and tied the whole thing down with rubber bands to help it dry. After the cage dried I took a small foam pad and dry-brushed on a small amount of silver paint to make the chain a cage look worn:
SQUIGGLES the plague Demon

OK guys I'm gonna wrap this one up and start on the next installment on how I made my banner pole (very simple). SO until then thanks for reading and please keep Spreading the word about the blog!!!!


      UPCOMING ARTICLES:
  • Plague mask
  • Goggles
  • Banner pole
  • Uniform
  • Cloak


Wednesday, May 9, 2012

Let your chaos flag fly Part 1 (plague banner)!!!!

Hello guys and gals!!
Sorry for the long break in post been a busy few weeks with Trek Trax Atlanta winding down (pictures for all to see) and a wedding coming this weekend busy, busy, busy.  Thought I would share with you guys the 99% complete plague banner and how it was built. So here is the completed banner:
Banner outside home
So this banner started off with humble beginnings:
  • 2 pieces of PVC pipe ($2.25 at Home Depot)
  • 1 L-joint ($.50 at Home Depot)
  • 3 wiffle balls ($1.00 at dollar store)
  • 1 yard of duck cloth canvas ($7.99 at walmart)
  • 2 lengths of plastic chains from Halloween
  • 1 Skeleton in cage ($1.00 at Dollar store)
  • 1/2 cube of Sculpy clay
  • Skull beads
  • push pin backs
  • 1 can textured paint (stone)
  • 1 can beaten copper paint (krylon fusion)
  • few handfuls of "dirt mixture" (see past article)
  • assorted paints
  • 1 box teabags ($1.00 at dollar store)
  • 1 Awesome printer gal at Kinkos/Fed-Ex
The 2 biggest things with this banner was trying to figure out the symbol for it and also the material of the banner. The symbol was not very hard since there are really to main symbols for nurgle in the 40K universe The fly symbol and the triple circle symbols"

triple circle
Fly
The material for the banner was a different story. We looked at a few material before we decided to use the canvas material so it wouldn't flap around as much.

After decideing on the material and symbol I took a JPEG file of the fly symbol to my local Kinnko's/fed ex store and had them enlarge it and print i out for me on standard paper, all said and done cost me $3.25 for it. I took the enlarged picture home and cut it out to make a stencil to lay on top of the banner:
I actually used a crap load of pins to stick it to the cloth so that it would not move while i painted it on with black Fabric paint, I also put a layer of plastic under it so that the paint would not bleed thru:
painting
Let the paint dry for a few hours before I removed the stencil and touched up the edges:
After the paint dried so that I could touch it I took the circles i cut from the patterne on the wings and used them to trace circles back on the wings and painted them with a rotten flesh paint I have used on a good bit of this project
Now I know some people are prolly saying "well i see some mistakes here and there" or "oh i see paint smears"  Yes those were all mistakes but added to the banner cause well its a banner to the plague god and nasty is good!!

 Now what banner to a chaos god would not be complete without some mystical looking writing and symbols:

All the symbols and such were either made up or mixed and matched from other symbol groups. They were all traced in pencil then gone over with black fabric paint.

During this time A few freinds were talking to me about dyeing the canvas a color to get away from the bright white color it was, so after talking to a few people I attempted the method where you dye cloth with tea:
As you can see BIG difference! so after much worrying about paint peeling an such I brewed up 2 gallons of tea and dumped it in a big tupperware box and dropped the banner in and soaked it for a few hours and this is what i ended up with:
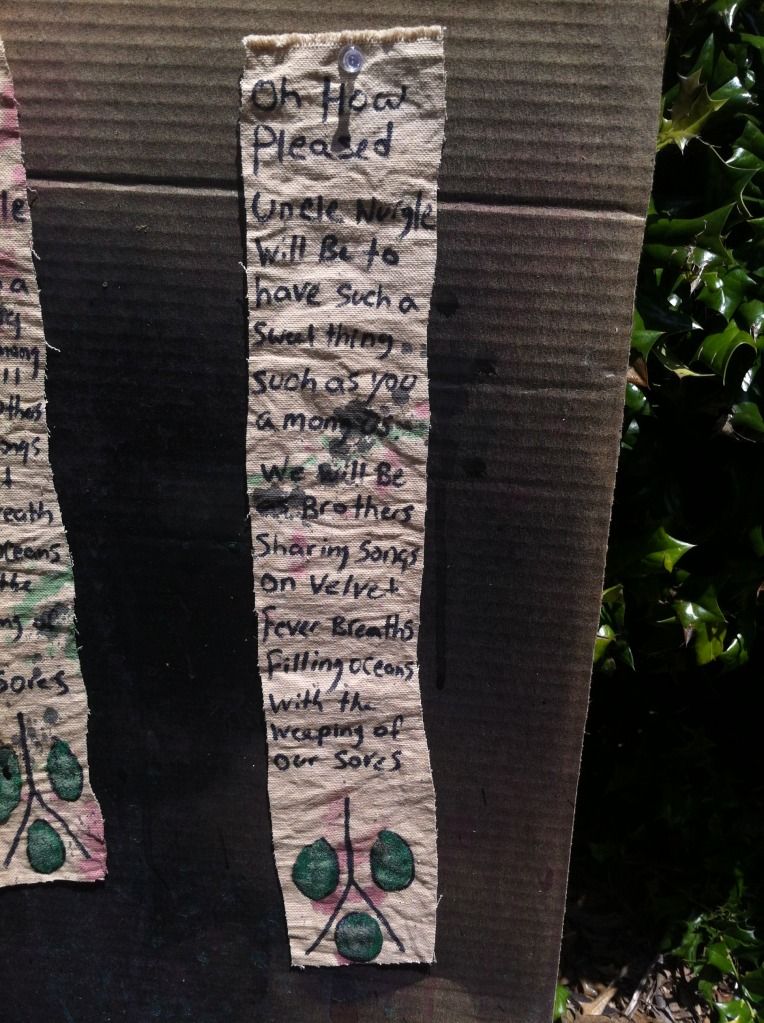
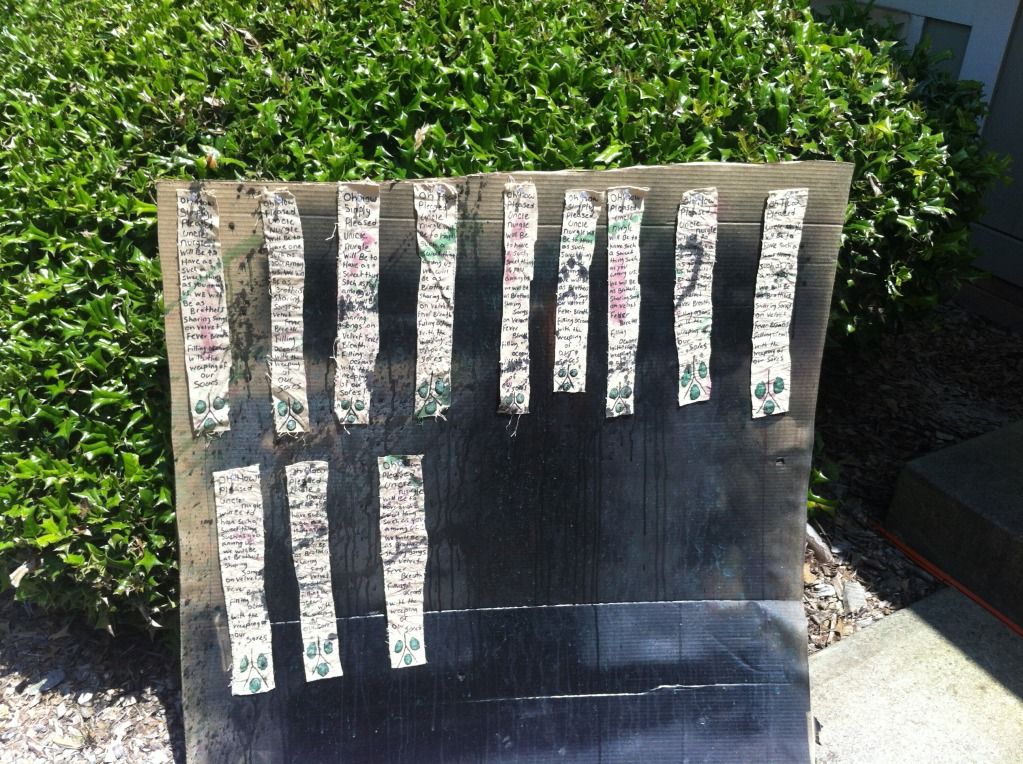
so after seeing how well this worked a took the extra material I had and soaked all of it in Tea and let it dry. I then decided a needed a few dedication papers for the banner so off I went back to the symbol writing board, Again all the symbols were drawn out in pencil and traced in black or red fabric paint:

The one in the middle was actually soaked in mustard and green paint for a few moments to see the effect.

After the banner was finished everyone  told me I need to "stress" it out a bit aka mess it up sooooo back out side I went, I used a charcoal lighter, a bowl of water and paper towels to ft the burns on the cloth. They were made by ripping the cloth and then setting it on fire and letting it smolder anf then smothering it with wet paper towels before it burst into flames. The rips on the bottom were made by making a small cut and ripping the cloth by hand. The stains on the cloth were made by a small amount of paint and water in a cup and then slung on to the banner with a foam brush:
Well ladies and gent this is finishing part one of the banner!!! tomorrow part two is gonna give you the hints i used to make the banner pole and all the extras for the banner, until then thanks for reading and sharing!!!

Tuesday, April 10, 2012

Dirty, Dirty Dirt

Howdy ladies and gents!!!

Be shocked and amazed two article in one month!!!! Been a busy first part of the month getting ready for TXA (Trek Trax Atlanta on April 20-22) and getting my Klingon on. Took a break from my Klingon costuming to work a little bit on the plague banner. I looked around at hobby lobby and such and realized that sand and mold pre-made tends to cost you a bit if you buy it. If you go to any hobby store and look for flocking like you use in a model it will cost you a bit. I was sitting around one day and wondered if i could make my own mold and dirt that would stick to my props and not suck my wallet dry. So after a little experimenting I ended up with this:
Inside
 
in sun

I posted a few of these pics on a costuming group I am part of and the main comment I got was that it looked to shiny and bright. So after a little experimenting here is what I came up with you will need the following ingredients:
  • Modge Podge Matte glue ( you can get at any hobby store or here)
  • Fine craft sand  (got 1 1/2 pounds at Hobby Lobby for $2.49)
  • Paints (depends on what color you what your dirt or mold to be)
So lets get started this is what I use to make mine:
The paint colors I use are:
 Now go get yourself a small container you dont mind using and something to stir with unless you dont mind using your fingers (I use mine). Pour yourself out a small pile of the sand ( the amount depends on how much you wanna make or how thick you want it to be:
 Now add in your glue I suggest starting out with a small amount and build up:
If you add to much glue then add some more sand to it, don't worry you can add more sand or glue if you get it to thick. Now is the time to add your paint (remember paint will add a little liquid to the mix so be prepared to add in a little sand). Give it all a good stirring to make sure the paint is mixed in. ****Now that you have added paint it will stain the same color as the paint so be careful.**** If you want to make a mix with out the paint then it will dry the color of the sand.
without paint
Paint added to mix
If you decided not to use any paint the mix will dry clear and a little bit shiny. the thicker you make the mix the easier it will be to make small hills or dips that can soak up paint.
 One thing here is that you can make this as thick or thin as you like. The mix will take a few hours to dry and then you need to spray it with some type of sealant or the sand will flake off as you touch it. With a little  paint and some washes you can end up with some pretty dirty dirt

Tuesday, April 3, 2012

Klingon Bracers..... The Next Generation

Hello all!!!!

Sorry I haven't written a post in a bit we have been really busy the last few weeks gearing up for a few local conventions in our area and also for our wedding in May. Before I get into today's blog let me do a little promoting for the local convention we are attending this month:
  This is a new Trek convention here in the GA area, it is also its second year running. It is a small convention that is also a great social convention. make sure you come by in April and check it out!

OK so on to today's topic wayyyyyy back in January I posted a blog about my $1.00 Klingon Bracers and promised to keep you guys updated on them. Well after a trip to Goodwill my $1.00 bracers have increased in price they are no a whopping........ wait for it...... $3.00 Klingon bracers! The trip to Goodwill was supposed to be a Nerf hunt but turned into a treasure hunt. I found a pair of children's shin guards that fit my arm just perfect and they only cost me $2.00 to grab:
The biggest changes that had to be made to them was to take the cloth padding out of the inside and a small amount on cutting to make them fit the original bracers
 To get the plastic original bracers to fit the shin guards I heated them with a household blow dryer ( yes I'm to cheap to buy a heat gun) and laid them on top of the shin guard and held them down with a few rubber bands pulled tight to hold them till they cooled down. After they cooled off I glued them down with hot glue and a small amount of Goop.

After they cooled down I decided to to continue the paint job on the plastic bracers onto the shin guards to tie them together:
If you look at a lot of pictures of the Klingon costume you see  claws on the gloves, I decided to take the idea and add the claws to the bracers. So off to Hobby Lobby I go, they sale in their leather working section a small bag of plastic claws for $3.00. I didn't add the cost of the claws into the bracers because I can use the left overs in another costume. So a little work with my Dremel and a lot of hot glue (now i think back I should have used epoxy) I got the claws attached to the bracers:
Tops
Bottoms

side view


The funny thing with the side view picture is you can see part of the crafting room and up in the top corner is a view at my idea/reference board for the plague preacher. Well right now the only thing to do to the bracers is shorten the Velcro strap so that it fits my arm without having a foot extra to tuck away:
Stay tuned for pics from Trek Trax Atlanta of the gauntlets in action!!!